anvil_davidstar
New tang screw....TIMING IT IN
Published: January 4th 2022, 7:58:57 pm
Ever wonder how custom gun screws are timed to torque up just as the slot aligns with the long axis of the gun? This is how I do it, right, wrong, or indifferent
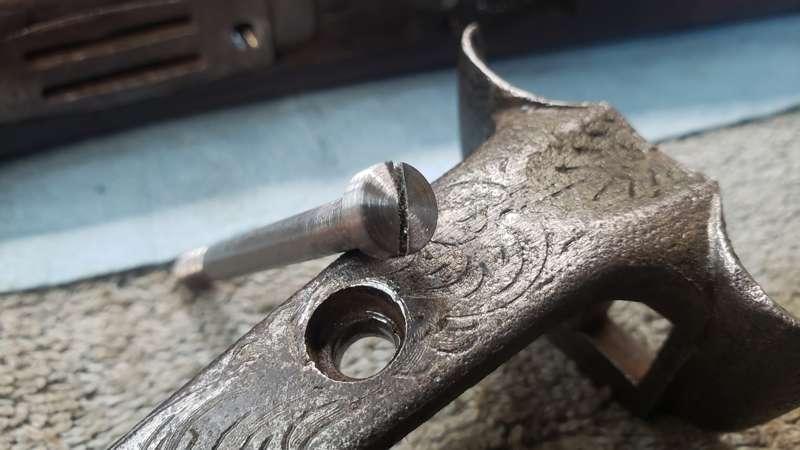
1. The screw is fabricated to length; Leave the head and threads long enough to work with. Remember, we have to hang onto this somehow! Ensure the countersinks and bottom metal threads are what you want, then fully torque to the need. Get it tight.
2. Cut, grind the bottom to just above flush. Leave a slight dome on this end, makes it easier to find the hole on reassembly.
3. Scribe a ring around the head. Punch on the slot axis just a little above this scribe line. We want the punch dimples to be removed as the slot is cut.
4. Remove from the setup and part the screw off just above the punch marks. Leave the marks in play for the next step. We will file off all the unwanted stuff once the slot is cut...
5. Cut, file, laser, blast in the slot. Spin the fastener in the lathe or drill motor and clean up the head. File down to the scribe line, then polish
6. In this case, I fire blued, but anything that works for you works for me.
Well, there you have it. You may notice that the head looks TOO good, and has to be knocked back a tad to look correct. A judgement call for the on site smith......
mark